Monday, November 28, 2011

28 November 1957 “Pies: Sheppard’s and Apple or How to Use Less Butter or No Crust at All”

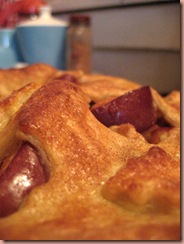
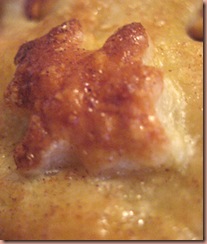
appliepiecloseup Is this a lovely golden mountain to climb to reach the pinnacle of mid century kitchenware? No, it’s simply my Thanksgiving apple pie.

I recently posted a how to on making your own butter. As many mentioned, which was true for me as well, it used to be more expensive to make your own butter. Now, however, with the rising prices at the market, I get a pound of butter and two cups of butter milk for about 9 cents more than just pre made butter. And it tastes more wonderful and I can flavor or give it an essence as I so choose.

This Thanksgiving was very low key for us. It was simply Hubby and I and Gussie and Hubby’s sister. It turned out to be such fun, just the four of us. The perfect number for cards and scrabble and just enough to make intimate table talk over roasted turkey and all the fixings a joy.

Since I had less to impress, if you will, I made sure to stay within my usual shopping budget. I allocated all the meat money to the Turkey and the dessert was possible, or rather decided upon, because I had a bowl of apples a month old that I had not touched. I went against my better judgment and bought them at our local Stop and Shop because they were a ‘bargain’. Well the bargain turned out to be a false economy when we found them all but inedible as an eating apple. I quickly returned to our local Farm where they grow their own apples and thought the higher price worth the value and simply cut back on supply, as I am continually learning to do more and more.

So, since the apples were available and I had my usual amount of butter, I was in a quandary. I could simply go out and buy more butter for the holiday or I could be a good future 30’s era Depression Homemaker and make do with what I had. So, when I looked at some of the various recipes for pie dough I realized the difference in quantity of the fat in old vs. new recipes. A quick look online showed the basic recipe I use for my pie dough when using butter, but the modern version used a cup or more (thats two or more ‘sticks’). My own recipe, from my Fannie Farmer from the 1950s (my go to butter based pie dough recipe) used only 2/3 of a cup.

Here is the plain pastry recipe I used from my Fannie Farmer. You will see that it calls for shortening, but I no longer use shortening. It’s all butter and lard or pan drippings for me.

                                              Plain Pastry

makes enough for a 9-inch two crust pie, or a 1-crust pie and several tarts.

1 teaspoon salt                                          1/3 cup shortening

2 cups sifted flour                                    1/4 to 1/3 cup ice water

Mix salt with flour in a mixing bowl. Cut shortening (or butter) into flour until mixture is in even bits no longer than peas. To do this use a pastry blender or two knives, one in each hand. You may use your finger tips if you work quickly, so that the heat of your hands does not melt the shortening. Sprinkle water over flour by tablespoonfuls, stirring it in with fork until just enough has been added so that you can pat the dough lightly together to form a ball. Handle as little as possible and do not knead. Wrap in wax paper and chill. (For two crust pie make two equal size balls and chill) When chilled (an hour or over night) roll out and line 9 inch pie plate.

This book is funny in that it has very little in the way of oven temps and cooking times. I think one was expected to have a certain knowledge of basic cooking that we simply have no access to today. If mother or grandmama were not there to teach you, one learned in Home Economics.

So, bake this at 425 F (220 C) for about 40 minutes. It can take up to 50 minutes depending on your oven. I like a brown crust but not overdone, so I cook about 25 minutes and then check it, if it is brown enough simply foil for remainder of baking.

When you do a two crust pie you need to put slits in the crust, but  you can also use this as an opportunity to get creative. I just used some little fall cookie cutters ( a leaf and an acorn) and cut out shapes before putting on the top crust and the ‘cut outs’ were also put back on.applepiedecoration Here you can see one of the little leaves all browned and yummy. I also egg wash the top and use the whole egg, not just the white, because I find it browns it nicer and imparts a more rich flavor than just the white. And of course a dash of cinnamon and sugar.
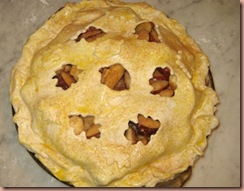
applepie1Here is mine before going into the over.

And here it is lovely warm and brown out.applepie2
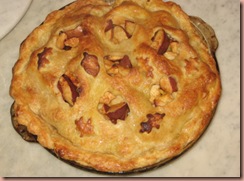
The filling of any pie is simply whatever you want it to be. When it is a fruit pie, it is simply fruit and sugar and spices. Here I used 8 apples cut and pared (I did not peel my apples. Normally I don’t as the local apples skins are so good, but these store bought would have been better peeled.) I cut them up in a bowl added about 1/2 to 3/4 cups white sugar and about one teaspoon cinnamon 1/2 tsp nutmeg. I turned and coated the apples, placed in the shell and used a bit more of my precious butter to dot the top of the fruit before I placed the top crust over it. You can invent and make up any pie to your hearts delight, which is what I love about baking and cooking; the creativity of it.

Now, were I trying to save more on my weekly budget I could have easily made a one crust pie and made a crumble for the top, thus leaving me another crust for  meat dish for the week. But, as it was Thanksgiving I thought it worth it.

Speaking of pies and watching one’s weekly budgets, a great ‘pie’ for dinner is a Sheppard’s or cottage pie. The distinction between the two is that Sheppard’s pie is made with lamb (as a sheppard herds sheep) while a cottage pie can be beef, pork. Although, I usually call such a pie with game a Game Pie, but I suppose they could be interchangeable. In many ways, for me, this is often simply a ‘leftover’ pie as one can simply take their leftover meat and veg and make this. If you have a meat grinder it is even better as your leftover beef or lamp chops can be ground quite easily the next day to fry up in meat broth and veg to make this pie.

This is the easiest dinner pie ever and certainly one can see the farmers wife or cottager inventing this to make their few staples hearty and tempting on a cold winters night in a little stone cottage on a heath.

Now, as many of you know, this is not a pastry pie. There is no dough involved. It also easily converts to a vegetarian pie, simply simmer your protein source and veg broth rather then meat broth and you will be just as happy with the result.
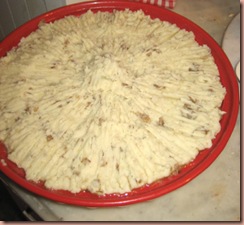
sheppardspieHere is my last Sheppard's pie before it baked. I forgot to get a picture afterwards, but it was all brown and lovely. I used ground lamb, as I find if I cut off the lamb from the bone, I can grind it to spread father and then the bones and fat go into water and simmer with onions and garlic for a good soup stock. We really can stretch our food budget if we try.

All you do is brown your meat (or skip this if you are usually already cooked leftover meat) with some onions. Add your veg of choice (or leftover) I like turnips in mine when I have them, which I often do as they last forever in a dark space like potatoes no need to refrigerate root veg. Add some meat broth or gravy and simmer for about 10 minutes then pour into a pie plate. Cover with a layer of baked potatoes, mark with a form to get nice brown peaks, and bake at 425 F until browned. Usually about 30 minutes or so. It is SO good and only improves upon the flavor the next day. Have fun with this one you can make it from anything. And using sweet potatoes or yams on top to make it more interesting maybe with some syrup for a sweet and savory mix with some cinnamon in the meat. This is surely an easy dinner pie that is needed in our failing economy. Perhaps we should dub it for the new millennium Economic Failure Pie? Whatever you call it, have fun with it.

Happy Homemaking.

Today on the Forum I linked a wonderful Flickr stream of pop-up 1950’s Christmas cards that are great. They are a wonderful inspiration so check them out. Go to the Forum and it is under Homemaking and Crafts, enjoy!

Saturday, November 26, 2011

26 December 1957 “Put on a Happy Face”

I would like to start today’s post by apologizing for being absent so long. We have had a fine low key Thanksgiving and beautiful weather, but I have felt out of sorts lately.

Maybe it is the approach of the year’s end which heralds my third year into my project living. I think due to my more analytical living, due to my project, I am feeling rather out of sorts concerning our actual time. The future and 2012 has some fear in it for me.

When I innocently began my project three years ago I was excited to uncover the truth of how a middle class homemaker lived. The thoughts, hopes, fears, and dreams she might have had by reading her magazines, watching her TV, and looking at her political world. As the layers peeled back by the end of 1955 I began to see a United States I wasn’t prepared for.

In some ways I have been able, as I am sure many homemakers during hard times were, to try and focus on hearth and home. I wanted to be in the know, certainly, but also to not let it color me too greatly. To ‘put on a happy face’ as they say. Keep the ‘red badge of courage’ lipsticked on my smile. But, in so many ways, the current state of our world leaks through and takes the silver lining out of the best made chin’s up cloud.

The economy is of course something is unable to avoid feeling. And for me to see the various laws and regulations changed so drastically over the past decade to lead us into our current financial state makes me angry. I see the banks and financial institutions simply fraught with greed not unlike a spoilt baby who will not be too told, ‘Too much sugar will make you sick’ but eats and eats in anyway and when it makes a mess we are left to clean it up at our peril. I long for the adults of the past.

In no uncertain terms many things that are wrong today were in some ways begun in the post war USA, but then we had adults. There was a generation of people who had seen and been in hard times. They wanted to make a better world and in so doing their offspring are now running ours.

I don’t like to seem to point a finger at a generation, but it is odd to me that the same generation that had to have rock and roll then practice their freedom of speech have become the very people who now have created the banking world that clutches all of us about the neck and stops any attempts at ones own expression of freedom of speech.

I want the grown ups back. I want the ‘Greatest Generation’ to rise up from their graves and wheel chaired loneliness in nursing homes and make everything right again. To slap their babies who will go on eating too much sugar and let us all know, “We have to have responsibility and be more cautious and put money in our piggy bank and eat our vegetables BEFORE we get dessert and to turn off the TV and go outside and play or read a book instead of play with that toy”. In so many ways its as if the grownups have really left us all to be looked after by the fat bullies on the playground. They want it ALL for themselves and don’t care what happens to us, but if we try and take a piece of their pie they slap us down.

Well, what does all this gibberish and mixed metaphor mean, you might ask? Honestly, nothing really. It has simply left me pondering too much to even handle looking at the computer and following a story from 1957 to today. I have had a good Thanksgiving and a fine visit with friends over coffee and apple pie and then really felt the need to simply percolate. Therefore, this post won’t be looking at any of those particular points, but rather just a timid, “I am sorry” that I have not posted and that I shall indeed get back to it starting today. We do need positive goals and hopes and dreams. We do need to focus on the good while still being aware of the bad. WE need to begin to become the grownups more as others have not done. As our money tightens, the prices rise, the jobs fail, the house equity dissipates, and inflation continues we need to be even more adult. We have to tell ourselves to turn off that TV and do our homework and learn and make do and mend. That is where the homemaker comes in. That has always been her strength caring the family spirit and hope in the hard times. Putting a smile on their face and others as they patch another patch in the threadbare clothes. A cheery tune cooking up a new fun breakfast made from what she can now afford stretched out with filler to make her decreasing pantry not seem so empty. Doing without more fore herself so she can sneak an extra penny in her pin money for the rainy days ahead. We are these things, we homemakers, rather we are full time homemakers or not. Even if we live alone we have to put that smile on our life by keeping our home a safe place a refuge from the increasingly dark world outside. We deserve to feel at home and to feel safe as possible and homemaking skills are important to that morale.

I hope all of you had a lovely thanksgiving, those of you in the USA, and that you were not too tempted by Black Friday to overspend or to support too much the big guys who have taken away much of what we love about small town life from the 1950s. I hope you think more about local or the ‘small guy’ when gift buying this year and put away the “Candy for the spoilt baby” as I believe they have had enough, don’t you think?

So, I shall continue to try and learn more and understand more of my world from then to now but I shall try harder to not let it color me too grey. That I shall continue to see the good with the bad and to learn more so as to be better prepared as the times get harder, if indeed they do. If they do not then I shall not be upset that I am wiser and more experienced. I shall indeed put on my happy face!

Happy Homemaking and Put on a Happy Face, I know I shall try:

I am going to try and post here what new item I put on the forum. Today I have added a fun tutorial on making a vintage Christmas bulb wreath I found online. It is in the Forum under Homemaking, Crafts, Christmas Crafts, enjoy!

Monday, November 21, 2011

21 November 1957 “Carving a Turkey and Fun Clothespin Doll Place Settings”

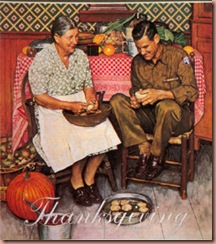
thanksgivingimage Thanksgiving is on its way here in 1957.  Last year I hosted a rather large gathering and posted about my menu and my homemade place cards. If you search Thanksgiving in the search bar above that reads “Search the Apron Revolution” many of my Thanksgiving posts will come up. There are too many to link to here.

This year it is a very small Thanksgiving for us with Hubby, myself, Gussie, and Hubby’s Sister. It will be more informal but still with all the fixings. We will wind down the day playing cards by the fire, sipping eggnog and discussing our coming Christmas party.

I hope all in the U.S. are excited about ‘Turkey Day’ and look forward to hearing about how you celebrate. For those of you outside of the U.S. for fun why not have turkey dinner this Thursday and toast a cheer to your American cousins, “Chin Chin”.

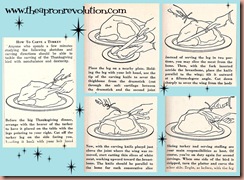
Let’s look at carving basics. I thought these were rather good instructions and so have put them on this card. You could easily print it out to the size of an index card and keep it in your recipe box or folder.howtocarveturkey

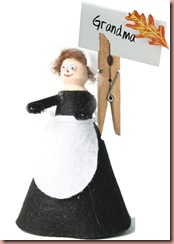
I was also taken by the idea of homemade crafts for the table. Those with children would really enjoy such a project. But even those childless couples can have a blast with clothespin art. There are many ways you could make these little wooden objects into fun Holiday decorations for any holiday. I propose for this project Pilgrim Place Settings. Little Clothespin dolls made to resemble pilgrims or Native Americans made with old fashioned pins. Then hot glue a traditional clip clothespin to its back to hold a name card or the menu for the Thanksgiving Dinner.

clothespindollmockup2Now this is simply a mock up I made with various images on the computer, so it looks a bit odd, but you get the general idea. You could easily paint the face rather than use googly eyes. One could also make them into turkeys with feathery tails.

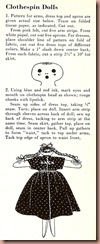
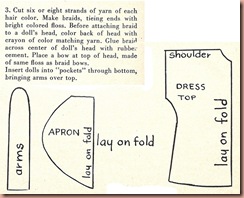
clothespindollies These little dolls and the instructions are from a vintage magazine. And these images are thanks to Blue Prairie Photo Stream who hopefully won’t mind our sharing her lovely find. I think it a good starting off point to make our Thanksgiving craft, don’t you?

clothespindollinstructions1 clothespindollinstructions2

I will post more Thanksgiving tips and ideas tomorrow and look forward to your sharing your ideas with me. There is also a section under Homemaking on Holidays in the Forum. Join up and share your tips and treats by clicking the forum button up top.

I hope all have a lovely day and Happy Homemaking.

Saturday, November 19, 2011

19 November 1957 “1950’s ‘On-line Christmas Shopping: The Magazine & Buttermilk Bread Recipe”

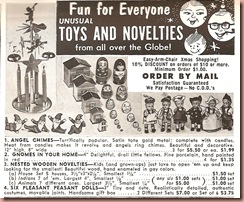
maggifts1 This little advert made me laugh so much, I had to share it. And so I thought I would share many of the little ‘gift ideas’ in some of my November issues of 1950’s magazines. The idea’s for Christmas gifts being bought in a magazine was there version of “online shopping”. Remember a basic conversion for the Inflation of the dollar is to multiply it by around $7 which was the rate from 1955. You will begin to see first that things were more expensive, but that in reality our dollar today buys very little in comparison.

Now I know it isn’t even Thanksgiving yet here in America, but with ‘Black Friday’ looming this coming Friday, its all I can do to not see everything Christmas when I went out on my errands and marketing yesterday. So with the Christmas spirit comes, I suppose, the Christmas buying. Why not enjoy the fun and odd gift ideas available back then in magazines: The online shopping of its day.

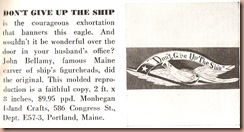
maggifts2 For the man who has everything? Couldn’t you just see this hung on 1950’s paneling?

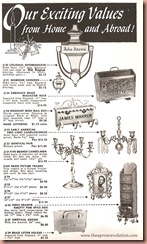
maggifts3 Some lovely items. I adore the ‘knotty pine’ spice box. It’d be a gem in an Early American Kitchen motif with rooster wallpaper. I like the little bedroom door knocker as well. It would again go well with a colonial or Early American theme. And it be a fun way to announce your entrance to a bedroom.

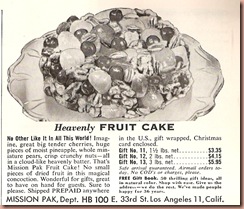
maggifts4 I happen to love fruit cake. Well, homemade fruitcake that it. It is a wonderful treat, but one can see where the running joke that once existed of the ‘traveling fruitcake’ given as a gift over and over. So preserved and so full of candied fruit there was little cake in it. This appears to possibly be of that variety, one can never know. But, I wonder how many grannies (having her tastes from the 19th century when sugar was more scarce and such a treat a joy) happily ordered this for the young suburban 1950’s family, only to have them groan upon opening it?

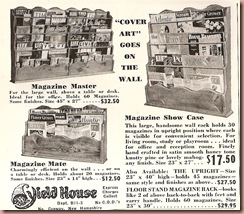
maggifts5 I think this is a brilliant idea. I like the idea of such a sturdy magazine rack. I have tried, in the past (well the future really) various magazine racks bought at Home stores only to find they are bad at display and make it impossible to have more than one or two magazines yet the holder takes up So much wall or floor space. These look clever and would look darling in a home library a study or even the living room. I like the idea of the double sided version on legs for $29.95. I might have to make a set of plans from this and see if I couldn’t make one up myself out of simple pine.

maggifts6 I wonder if this was one of the first dry/paint and wipe artist set ups for children? The precursor to the etch-a-sketch? Which came first this or  the dry erase board for Father’s office? A chicken and egg situation I suppose.

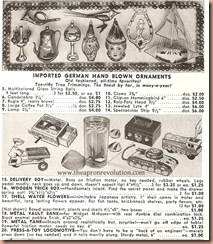
maggifts7 This ad has some fun items and treasures that have been bought up and saved, I am sure, for many Christmas. These type of items can often be found on eBay or in antique stores. But now, due to their nostalgia, can sometimes be too pricey for what they are. But often yard sales and estate sales give up such fun little treasures that some auntie ordered with excitement to decorate for the holidays.

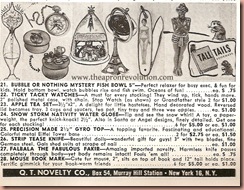
maggifts8 Some more Christmas items and some fun stocking stuffers. I would love to have known what type of plant came out of that shell you place in water. Was it a real plant that grew over time? Or was it a plastic treat that was exposed when touched by the water? Does anyone know?

maggifts9 Was the nativity snow globe the first of its kind? Did the Ticky Tacky grandfather watch suggested as a stocking stuffer really work? Did little Timmy ever find Papa’s ‘striptease’ knife in share it with his pals up in the Tree house? I actually recall the wooden apple/tea set. I had one when I was a child and now I see it must have been one of my older Sisters who were children in the 1950’s.

Do you see anything you like?

I promised the buttermilk bread recipe I use in tandem with my home-made butter. With one quart of whipping I cream I get one pound of butter and two cups of buttermilk. Those two cups go into these two loaves of bread. The recipe came from allrecipes.com

Buttermilk Bread

Ingredients

  • 1 1/2 cups buttermilk
  • 1/2 cup warm water (110 degrees F/45 degrees C)
  • 1/2 cup margarine
  • 1/4 cup white sugar
  • 1/2 teaspoon baking soda
  • 2 (.25 ounce) packages active dry yeast
  • 2 teaspoons salt
  • 5 1/2 cups bread flour


Directions
  1. Proof yeast in warm water.
  2. Place the butter or margarine and buttermilk in a small saucepan. Heat slowly until butter or margarine has melted. Cool to lukewarm.
  3. Place sugar, salt, baking soda, buttermilk mixture, and yeast in large mixing bowl. Add 3 cups flour one cup at a time, and mix with the dough hook attachment of an electric mixer. Gradually add the remaining flour while continuing to mix. When dough is not sticky, turn out on a lightly floured surface. Knead for several minutes, until the dough is soft and smooth. Place in a greased bowl, and turn once. Allow to rise until doubled in size.
  4. Punch down the dough. Divide, and shape into 2 loaves. Place in two well greased 8 x 4 inch bread pans. Allow to rise until dough has risen one inch above pans.
  5. Bake in a preheated 375 degrees F (190 degrees C) oven for 30 to 35 minutes. Loaves are done when nicely brown and hollow sounding when thumped.

Well, happy day dream shopping in the past and Happy Homemaking.

Wednesday, November 16, 2011

16 November 1957 “The Adaptable Cafe Curtain”

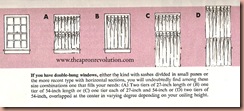
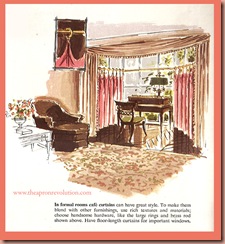
cafecurtains9 I thought I would share this great article on the use of cafe curtains. As many of you know, cafe curtains are straight hung curtains that usually cover half a window, allowing light in, but can also be hung in tandem with multiple layers of cafe curtains.

These are great ideas no matter what age or style your house may be and also a great source for those vintage purist.

cafecurtains5 cafecurtains6 cafecurtains7

cafecurtains8

cafecurtains2 Formal tocafecurtains4 bath to

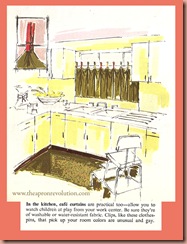
Hallcafecurtains3 cafecurtains1 And kitchen. I love this idea, too, using the colored clothes pins.coloredpins I have two sizes, a standard and a smaller, HERE and HERE in the Corner store for sale. They are around $4. You could also have a lovely matching or contrasting look by painting plain wooden pins, as well. I like this idea, as if you don’t sew you could use darling vintage or vintage look towels, tea towels, small tablecloth or runners. Even if it is larger, you could double it up and hang it up to show the area of the tablecloth you like and it would still have the look and feel of a curtain.

Enjoy these images and have fun dreaming of how to use them. I am off today with Hubby and Gussie to my MIL. It is her birthday and we are celebrating before she leaves this weekend for Florida until Spring. I made a lovely Custard rice pudding I will share with you later as well as a ground lamb Sheppard’s pie that is easy and so delicious.

Happy Homemaking.

Sunday, November 13, 2011

13 November 1957 “Recession Butter: A Churner’s Tale”

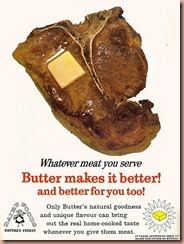
buttergirl Often Butter is tied in a comical way to the 1950’s. ButterSteak

There have even been really bad modern commercials that somehow seem to represent a past that never was, spreading sticks of the stuff everywhere. Meet the Buttertons:

The irony of this situation, is of course that butter is actually better for you than margarine, yet this myth still exists today. In fact, at the turn of the last century heart disease was rare. By the end of the 1960’s it was one of our number one killers. The irony being that it was during the 1950’s that advertising told mother’s that margarine was better for you and it saw a large increase in use.

A researcher named Ancel Keys was the first to propose that saturated fat and cholesterol in the diet were to blame for coronary heart disease. Though this has still yet to actually be backed up or shown to be true, though countless millions have been spent to check this fact, we are still largely in belief that butter is bad for you and a diet in lower saturated fats is better for you. Ironically, however, “As a result, since the early 1970's, Americans' average saturated fat intake has dropped considerably, while rates of obesity, diabetes, and consequently, heart disease, have surged.”

Here is a great list of reasons butter is actually good for you:

  1. Butter is rich in the most easily absorbable form of Vitamin A necessary for thyroid and adrenal health.
  2. Contains lauric acid, important in treating fungal infections and candida.
  3. Contains lecithin, essential for cholesterol metabolism.
  4. Contains anti-oxidants that protect against free radical damage.
  5. Has anti-oxidants that protect against weakening arteries.
  6. Is a great source of Vitamins E and K.
  7. Is a very rich source of the vital mineral selenium.
  8. Saturated fats in butter have strong anti-tumor and anti-cancer properties.
  9. Butter contains conjugated linoleic acid, which is a potent anti-cancer agent, muscle builder, and immunity booster
  10. Vitamin D found in butter is essential to absorption of calcium.
  11. Protects against tooth decay.
  12. Is your only source of an anti-stiffness factor, which protects against calcification of the joints.
  13. Anti-stiffness factor in butter also prevents hardening of the arteries, cataracts, and calcification of the pineal gland.
  14. Is a source of Activator X, which helps your body absorb minerals.
  15. Is a source of iodine in highly absorbable form.
  16. May promote fertility in women.9
  17. Is a source of quick energy, and is not stored in our bodies adipose tissue.
  18. Cholesterol found in butterfat is essential to children's brain and nervous system development.
  19. Contains Arachidonic Acid (AA) which plays a role in brain function and is a vital component of cell membranes.
  20. Protects against gastrointestinal infections in the very young or the elderly.


Now, despite its good or bad qualities, butter has been around forever. It is, in its simplest terms, the fat solids removed from the heavy cream of the milk. Agitating such cream separates the butter from the milk, leaving you with buttermilk.

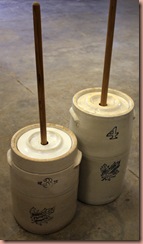
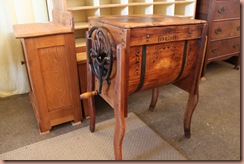
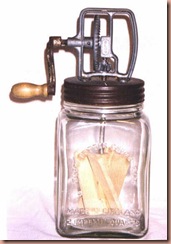
ButterChurn Butter churns have been made from everything from ceramic and stoneware, to wood and glass.butterchurnwood butterchurnglass Any means necessary to creating a motion that results in the butter and milk to separate.

Now, there are different types of butters depending on the cream used. Before factory made butters were introduced first in America in the 1860’s, the cream used to make butter was fermented. One collected the milk from the cow or goat or sheep and it would sit and ferment.

“During fermentation, the cream naturally sours as bacteria convert milk sugars into lactic acid. The fermentation process produces additional aroma compounds, including diacetyl, which makes for a fuller-flavored and more "buttery" tasting product. Today, cultured butter is usually made from pasteurized cream whose fermentation is produced by the introduction of Lactococcus and Leuconostoc bacteria.”

In the 1970s cultured butter was made by incorporating bacterial cultures and lactic acid. “Using this method, the cultured butter flavor grows as the butter is aged in cold storage.”

Today, however, pasteurization is the norm and butter made from pasteurized cream is called Sweet Cream Butter. This is often what is available from the store.

Ghee, is an Indian clarified butter made by “bringing the butter to a high temperatures of around 120 °C (250 °F) once the water has cooked off, allowing the milk solids to brown. This process flavors the ghee, and also produces antioxidants which help protect it longer from rancidity. Because of this, ghee can keep for six to eight months under normal conditions.”

Now, my main reason for discussing butter today was to show you how easy one can make it at home. This was not something I have always done, but necessity is the mother of invention, or at least in my case, the Mother of Need. As all of you know, grocery prices continue to rise. Butter, at least in my area, is literally twice as costly as when I began my experiment of 1955 in 2009. Then I could buy one pound of butter around $2. Today that same butter costs $4 and that is the cheaper store brand. This lead me even to consider the very cheap margarine. I saw a one pound package of a store brand for only 75 cents. This is a HUGE savings and almost lured me into is wretched quality with that low price. But, I realized it is better for me to trim the fat (pun intended) in other ways, such as reducing meat purchased and adding more beans and other protein sources.

Now, making butter at home is not hard and can be quite fun. It can take really only about half an hour total and then you have your butter for the week.

This tutorial I used the pasteurized store brand heavy whipping cream. Obviously, if one can get organic raw cream, a more wonderful tasting butter can be derived, but I wanted this to be an easy ‘anyone can try it’ exercise.

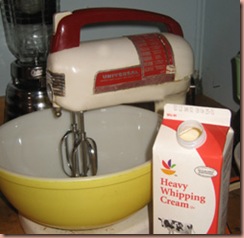
butter3 So, you can use your mixer or your blender. I have used both, but actually prefer the mixer. You can see here I am just using a Stop & Shop brand Heavy Whipping Cream. I like to not buy from larger chains too often, but I wanted this to be a good easy access tutorial. One can do it with basic whipping cream from a local convenient store.

However, if you enjoy it and would like to make your own butter more often, it is true that Butter from grass-fed cows contains higher levels of vitamin E and beta-carotene (which is responsible for the yellow color in butter). And it not being pasteurized would also allow you to ferment and get a truer old better quality butter. But for this purpose, what you get from heavy whipping cream is still a better product than the butter for sale at the store. And you can flavor it and mold it however you like.

Now why I first decided to make my butter as part of my weekly savings in my shopping was this:

  1. one pound of butter costs $4
  2. one quart of cream costs $4.29 From this you get one pound of butter and 1 1/2 –2 cups of buttermilk

So, really I am paying 29 cents more but getting the same amount of butter, better quality and the buttermilk adds to my milk allotment for the week going into various things. How I am currently looking at it is I have a buttermilk Bread recipe that requires 2 cups butter milk and makes two loaves. So, for that 4.29 plus a bit more for the flour and yeast, I am getting

  1. one pound butter
  2. 2 loaves buttermilk bread

So, to me, it is worth it both for economy and taste/quality.

So, as I said, one quart of cream makes one pound of butter.  So in other terms one US quart is =

  1. 0.946 liter  or
  2. 0.833 British quart

Pour your quart of heavy whipping cream into your mixer and set it on med. It is best to have the milk at about room temperature or around 55 degrees. If you do this straight from the ice box (fridge) it takes longer. I did it once and it took 35 minutes as opposed to about 15. Though some sites claim it can take only 10 minutes, but my mixer is very old from the early 1950’s, so perhaps it is not up to a modern version.

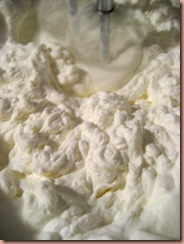
butter4 At first, of course, you get whipped cream. That is, after all, what whipped cream is.

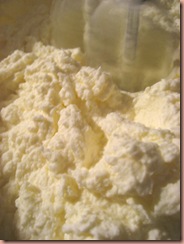
butter5 Then it begins to form stiffer peaks until it starts to form thicker chunks. And you can see it becoming more butter yellow. Though it is true that it is not as yellow as butter made from organic unpasteurized butter which is allowed to ferment, it still begins to take on that lighter yellow we are familiar with from commercial grocery store cream butter.

At this point, as well, you are just watching and enjoying. It isn’t as if it is hard work to pour in cream and turn on our mixer. Think of our ancestors churning away. Although, I have to admit, that seems also a way to have a sort of relaxing zen afternoon, churning away. But, for busy modern people this is a very realistic process, just pour and turn on mixer.

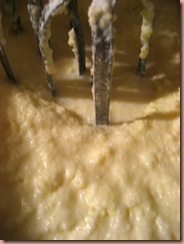
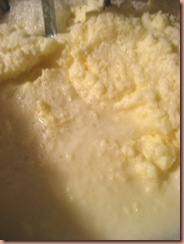
butter6 So, now depending on cream temp when you begin and your room temp and speed of mixer, anywhere from 10 –30 minutes you will begin to see it hit this phase where it suddenly goes quite wet and sounds as if you have added water or are mixing up a runny cake.butter7 You can really see the liquid now separating from the butter.

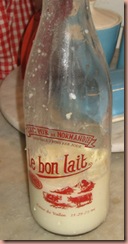
Once you have reached this state, you simply pour off the butter milk. The first time I did it I put a cheese cloth over a funnel into the container I was pouring to catch any little clumps. butter8Now, I can’t be bothered and I just use my fingers to hold most of it back, as some of the chunks into the buttermilk just makes a nicer product to cook with. You can see the butter chunks on the side after I just drained my butter milk into my bottle. Pancakes, biscuits, and bread made with this butter milk is heaven!
So, simply drain out the excess water. At this point add a bit more water back to the drained butter, say about a 1/2-1 cup or so, and run the mixer again. Be careful not to splatter, I put a towel around the mixer to help with that. Then drain this water down the sink. I don’t add this rinse water to my butter milk. You are meant to rinse it until it runs clear, but honestly that is only if you want to have a lot of butter stored longer. Some liquid left in your butter does not hurt if you are going to use it up in a week or so. Which I do. Therefore sometimes I don’t even rinse it, just drain the butter milk and go to the next step.

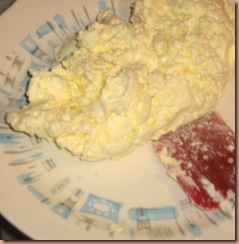
butter9 Now, with your strained butter, put it on a plate. This works best in a wooden bowl and spoon, but again, I wanted this for anyone to do. So here a spatula and plate work fine. You are simply going to work the excess liquid out at this state to make your final product.

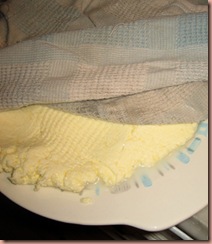
butter10 You can use a towel or paper towel. I prefer an actual towel, but that is up to you, I think paper towel or paper napkins would work fine. You are just sopping up the moister. I just press down and then turn over and press down again to get most of the moisture out. You can see the pattern from my towel in it. This shows you the possibilities for molding and patterns. Homemade butter lends itself to such beautiful presentations. And there are many butter molds available, but you could use anything that has a pattern or shape you like.

Now, it is at this point that I usually add sea salt. Sometimes I make unsalted butter to bake with or you can add anything you like. Chopped nuts and maple syrup is wonderful. Or cinnamon and honey. Or chives, garlic, lavender, you name it. Mix it in after you have removed the excess water and work it into the butter. You could break it up into a four varieties easy enough.

You could easily enough just spread you new butter into a container to use, like soft butter from the store. Or you can shape it into any shape.

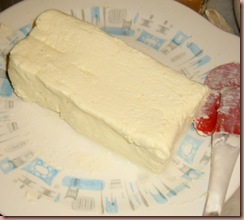
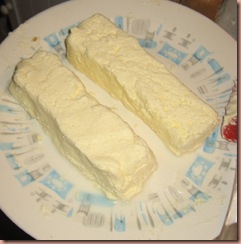
butter11 Here I shaped it roughly into a block, butter12 then cut that in half. This makes two 1/2 pound sections.

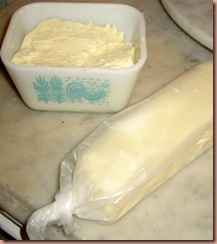
butter13 I like to take 1/2 pound of it and make a stick out of it wrapped in waxed paper and the other half loose in one of my Pyrex dishes. I leave the Pyrex dish on my counter for toast and other spreadable needs and the 1/2 pound goes into my fridge for baking. 

It is Very easy and cost effective and worth a try. You simply turn on mixer, wait, pour, dab with towel and put in container and you have butter and buttermilk. You should try it.

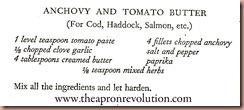
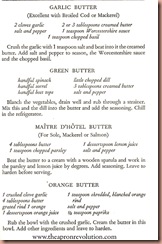
I thought I would shared these easy flavored butters from my 1950’s Dionne Lucas Cordon Bleu Cook Book. You could really add anything to make a good butter.

anchovybutter

butters

I hope you enjoyed this and would like to give it a try. As homemakers we have to look to what is the smartest way to deal with higher prices and buying less. It should not mean we sacrifice taste and joy in cooking.

Happy Homemaking.

Thursday, November 10, 2011

10 November 1957 “Blue Green Color Scheme with Clever Wall Storage, and Scones”

bluegreenkitchen1 Although this article was concerning acoustical tiles that allow for a more soundproof home, I was taken by its vibrant color scheme and clever storage. This home is quite small but really a normal size for the burgeoning suburbs of the mid century. Sound was an issue due to the proximity of close neighbors as well as room to room and more open floor plans. Many new home owners of the growing middle class were either old apartment dwellers, who would have found the ‘small’ home quite spacious particularly with their own garden space. While many more established middle class families fractured away from the bigger family homes where grandmother and unmarried aunts people the many bedrooms and multiple floors.

So, the need for sound barrier was enough that it could support a product line. This same sound proofing would continue on as families made ‘rumpus rooms’ in basements and made over screen porches where Father or teens could listen to their new louder Hi-Fi systems without driving mother or neighbor nuts.

I was really taken by the color scheme. We have talked about blue green as a color scheme before. This use of almost navy on the wall with a pistachio on the steel cabinet and hints of robins egg are all married in the fabric of the curtain which slides to make various ‘rooms’.

bluegreenkitchen2 This is my favorite bit. You can see here that these very shallow built ins were part of the acoustical wallboard makeover. but, these very same ideas could easily be done by any homemaker or hubby with a more traditional drywall and stud wall. Simply finding the studs and marking out the size you would need, you could either work in the 16’ width framework or open up a section by removing a bit of one of the studs and shoring it up with a 2x4 bracer at top and bottom. It it is an interior wall, even easier as there will be no insulation in the  way. This is the perfect place to use vintage or expensive wall paper as a backdrop where you could only afford a piece. Even a collage of Wallpapers from a free sample book being tossed by your local paint and paper store.

I have yet to redo my own kitchen. It began with more glorious ideas of add on to include a mudroom and separate laundry room and pantry. Every time I reconsider and think of the waste and money, I get more clever and downsize my plans. This built in ‘laundry room’ would be a clever way to do so. I am considering buying a used stackable washer dryer and selling our current normal sized pair that take up much of my kitchen space. This I would build into a corner and with the built in wall I could add these assets here. The more we think of what we do and how we can be more efficient, the less space we can do with when we use that space to its fullest.

So, again my kitchen plans shrink, but with smaller appliances hidden or below new counter space, I may even find room for my breakfast room I always wanted. And it might not need its own room, but simply another corner of my very small kitchen.

What do you think of the colors? Do you like the idea of combining a few working rooms into one, like laundry/kitchen?

And what does one love to do most in ones kitchen? Cook and Bake, of course and so here is a simple but yummy raison scone recipe. It is quite basic and if you don’t like raisons, chocolate chips, nuts, dried fruits can easily be used alone or in combination. This is just a good basic all round scone recipe.

Raisin Scone

  1. 2 cups flour
  2. 1  Tbs baking powder
  3. 3 Tbs sugar
  4. 1/4 tsp salt
  5. 5 Tbs chilled butter cut into chunks
  6. 1/2 cup raisons (or similar)
  7. 1 cup cream or canned evaporate milk (use full strength don’t dilute)

Preheat oven to 425 F

Mix flour, baking powder, sugar and salt and add chilled butter cubes. Using a pastry cutter or two knives, cut butter into flour mixture until it is crumbly. You want little butter chunks as that adds flakiness.

Add raisins and cream stirring to combine. Then sprinkle lightly with more flour and flour a surface to roll dough out upon. Flour hands and place dough on floured surface. Knead one or twice, don’t over work it! Press down to about 1 inch thickness and cut with biscuit cutter or inverted glass. Place on greased cookie sheet and brush on cream/milk and sprinkle with sugar.

Bake about 12 minutes, but check as you want them to just have the slightest hint of brown. Remember food continues to cook after you take it out of the oven, so take them out a bit before they look brown enough.


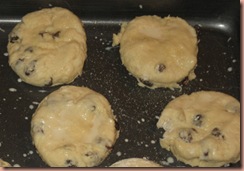
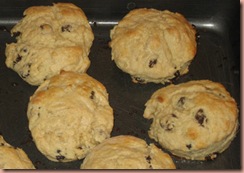
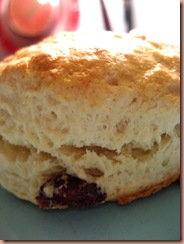
scones1 Here they are before oven.scones2 And here they are after baking and setting. scones3 Look at that lovely texture and I love a good raisin scone. I had these as part of my tea break yesterday.

I hope you enjoy these and will consider using space you already have if you are planning any remodels. With our tightening belts we don’t have to do without, we just have to do with MORE brain and planning to most likely better results.

Happy Homemaking.

 Search The Apron Revolution